- Node.js
- npm
- Terraform (only for deployments)
In the root of the project run below command.
$ npm installAfter that create .env.local file in the root of the project and fill it with enviroment variables. You can find their names inside .env.local.example
$ npm run devBuild project with below command
$ npm run tf-nextAfter build run set of following commands
$ export AWS_ACCESS_KEY_ID="your-access-key-id"
$ export AWS_SECRET_ACCESS_KEY="your-secret-access-key"

$ terraform init    # Only needed on the first time running Terraform

$ terraform plan    # (Optional) See what resources Terraform will create
$ terraform apply # Deploy the Next.js app to your AWS accountMake use of one of the best headless CMS service and great technologies such as Next.js and GraphQL to create blog website.
Back in the days when we wanted to create a blog website, we probably would use some classical CMS (Content Management System) like WordPress. It is a really powerful tool that allows a non-technical person to create a website from the beginning to the end, and after all to manage it well. That's because, besides the possibility of creating content, we can also produce a user interface without writing any single line of code. It is a great approach. However, if we would like to add some more dynamic features, it would become a nightmare. Additionally, if you don't want to use templates because you want to create a unique website, you should consider another solution.
Headless CMS gives us much more flexibility than classical CMS. The main difference between those two approaches is that headless CMS doesn't take part in designing and returning UI of the website, but it only returns pure content, for example in JSON format. This enables us to create a custom frontend with the use of any framework we want. Such flexibility is also needed when we want to build a scalable solution, not dependant on many limitations that WordPress undoubtedly has.
This is one of the best and most popular headless CMS product on the market. It gives us two main admin interfaces (GUI) for creating:
- models (like in a normal database),
- content entries (for content creators).
With such features, we don't even need any specific knowledge about backend services to kick off our project.
Contentful exposes two types of APIs to fetch our content data: REST API and GraphQL API.
I've chosen this option for the sake of the flexibility of this approach. At the roots, GraphQL is just a specification which defines query language for predictable data transfer across web network. In my opinion, GraphQL creates the most possible pleasant experience for interacting with API and that's the reason why his popularity over the last years is growing so fast. In the example that I'm going to present I used Apollo Client, which is a client-side library for fetching data from the GraphQL server. It is also a state management library, but this topic is just out of the scope of this article and you can read more about it here.
In the previous sections, I've used few times the word flexibility. And it ain't going to stop here, because Next.js is the most flexible React framework out there. It lets us easily create full-stack web applications thanks to the Node.js server that we get out of the box. But still, the most impressive thing in this framework is the straightforward way of switching between rendering modes. We can easily point to a component that is statically rendered and tell another to use server-side rendering. And if the two previous approaches still don't meet our requirements, then we can use client-side rendering like in a typical single-page application. However, when we are talking about creating a blog, we should always remember that client-side rendering has a very negative effect on the SEO of any website.
Before you start, you need to ensure that you have:
- Contentful account
- Node.js installed on your computer
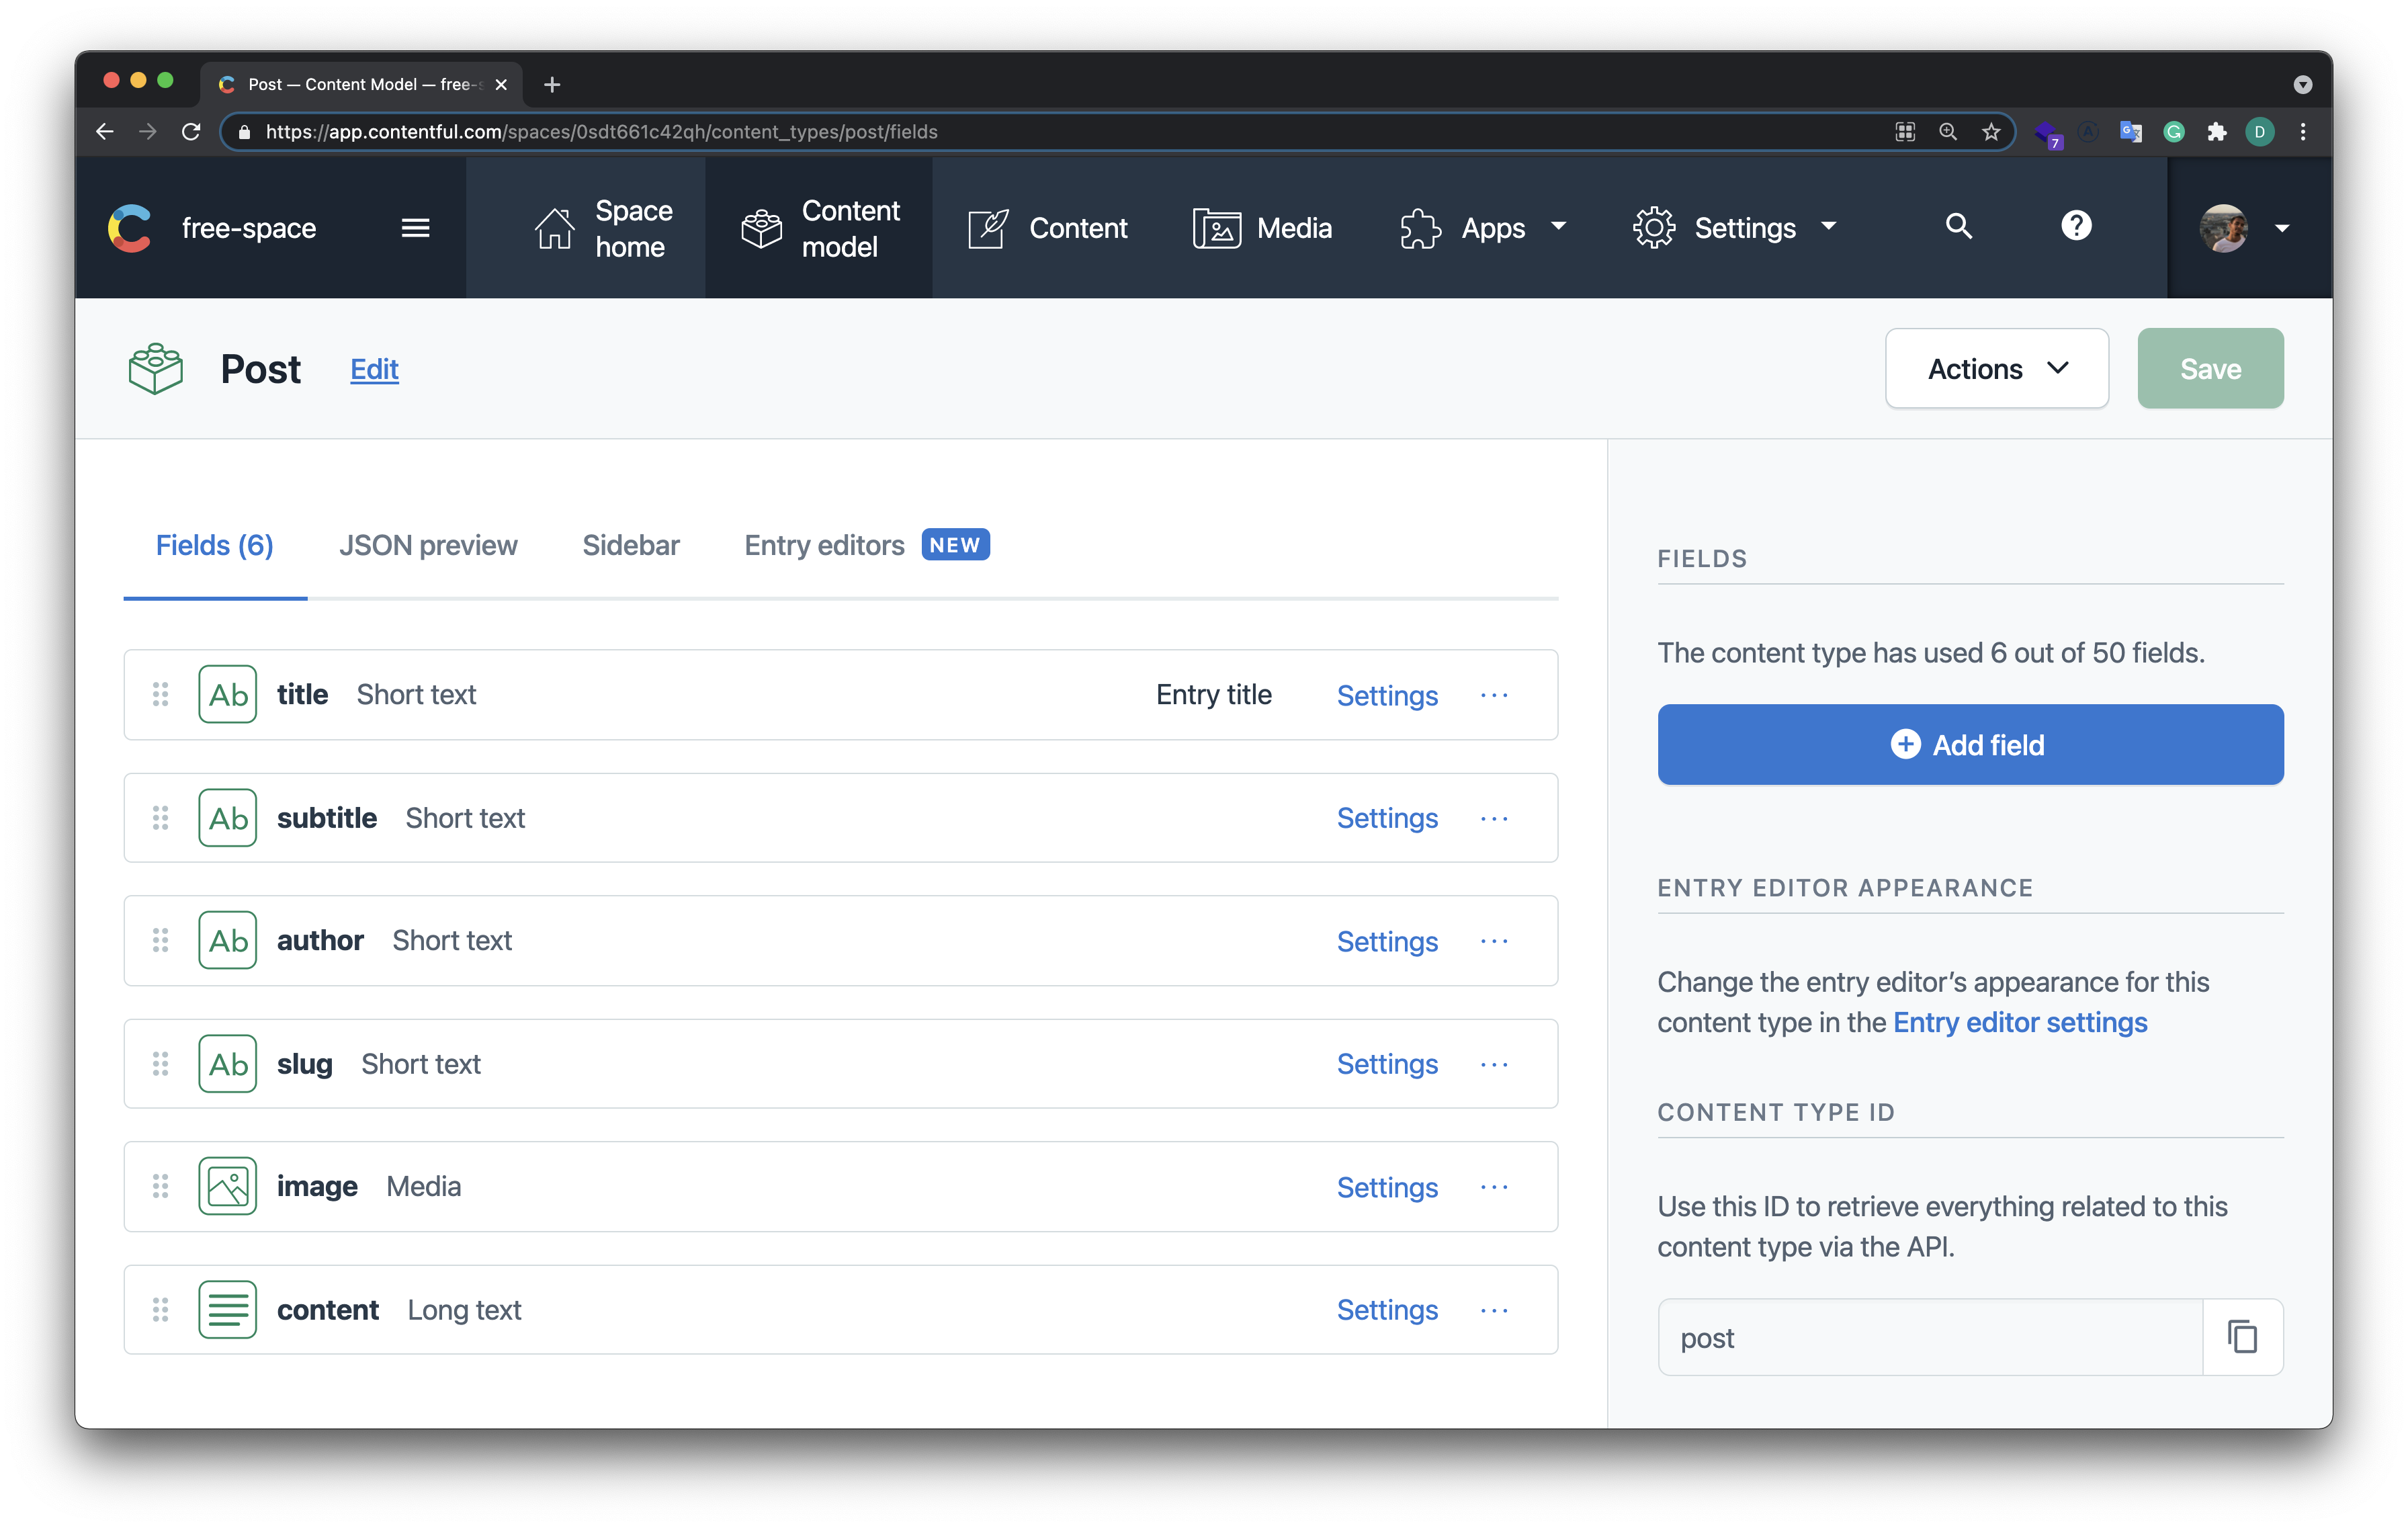
After login, go to the Content model dashboard and click on Add content type. My Post model looks like this.
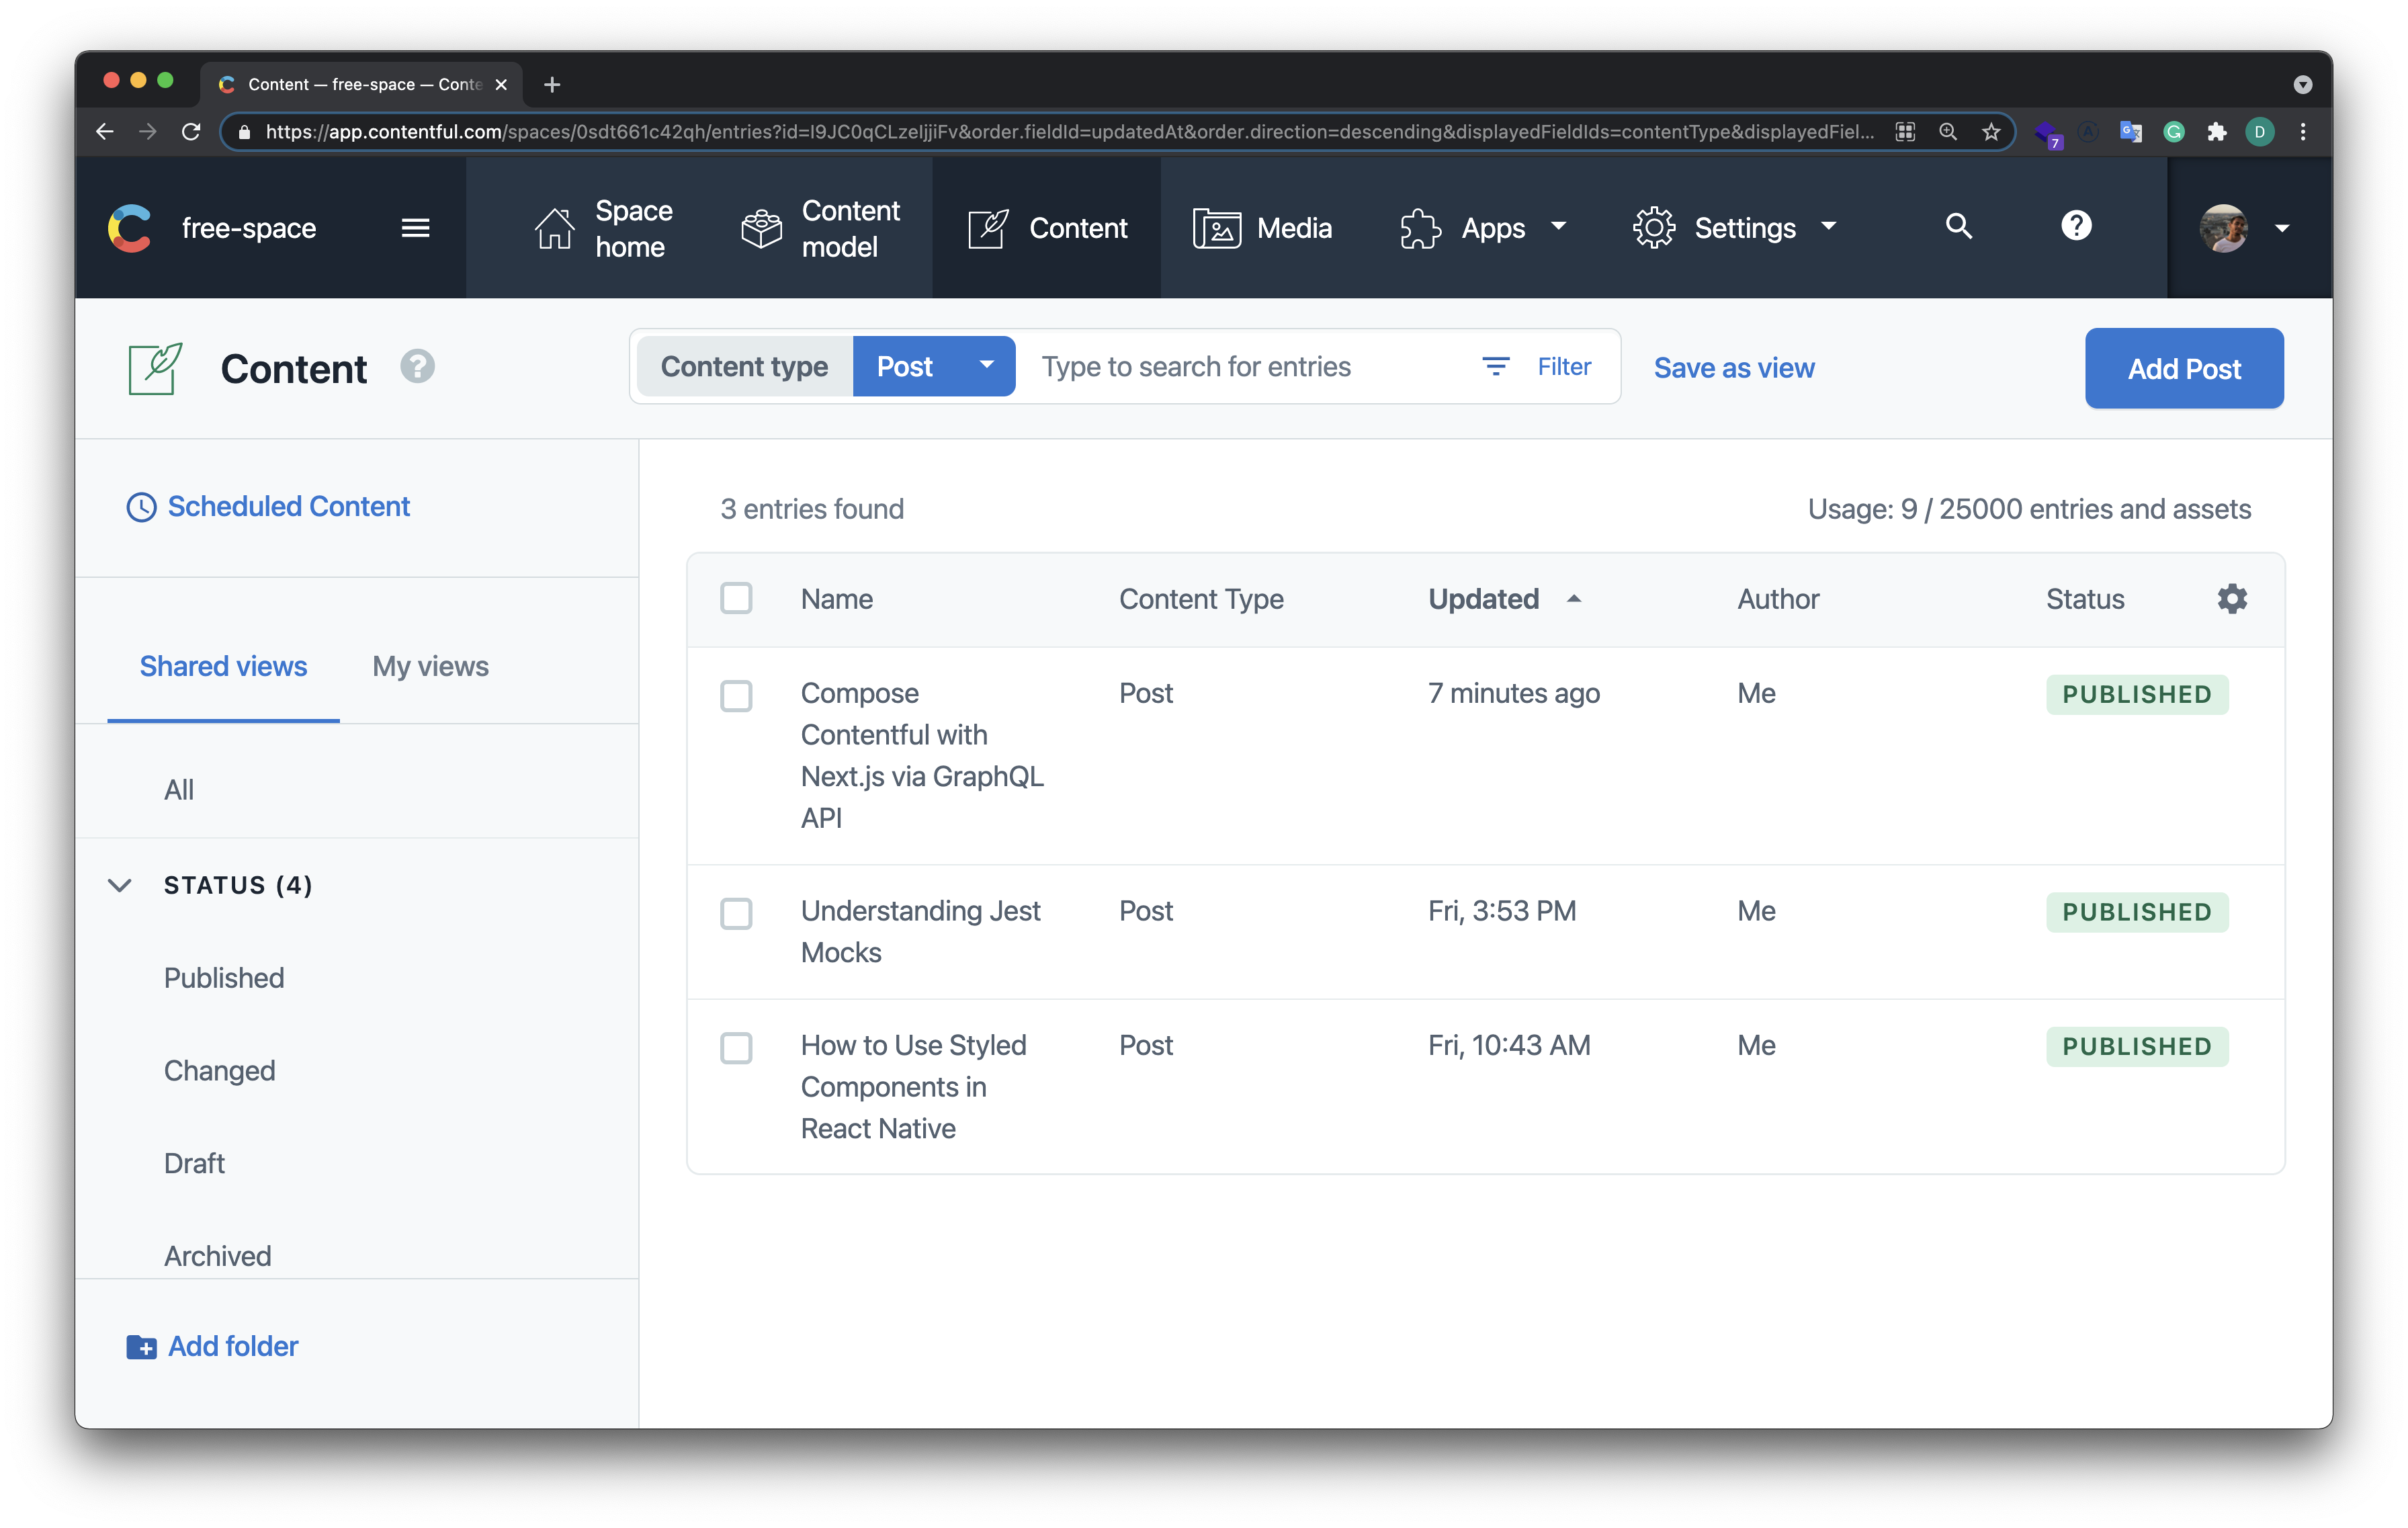
Then you can go to the Content dashboard to create few entries.
After, it is possible to open GraphQL Playground inside your Contentful account. Go to the Apps dashboard and install GraphQL Playground. Notice, that we created our robust and ready-to-go GraphQL API in only a few clicks!
The most preferred way to init Next.js project is to use the create-next-app CLI tool. So let's start with it.
$ npx create-next-appAnd we are ready to go! Run the below command to start the development server, switch to a browser window, and type in http://localhost:3000/. You probably going to see some basic project layout.
$ npm run startWe need to query our GraphQL Contentful API. First of all, install the following dependencies.
$ npm install graphql @apollo/client apollo-link apollo-link-httpCreate a new file in the project root called .env.local where we will store environment variables.
/// .env.local

CONTENTFUL_SPACE_ID=your-space-id
CONTENTFUL_ACCESS_TOKEN=your-access-token
Swap mocked values for your real secrets. You can take them from the Contentful Settings dashboard.
In the end, create src/utils/apollo-client.js file.
/// src/utils/apollo-client.js

import { ApolloClient, InMemoryCache } from "@apollo/client";
import { ApolloLink } from "apollo-link";
import { HttpLink } from "apollo-link-http";

const TOKEN = process.env.CONTENTFUL_ACCESS_TOKEN;
const SPACE = process.env.CONTENTFUL_SPACE_ID;
const URL = `https://graphql.contentful.com/content/v1/spaces/${SPACE}`;

const http = new HttpLink({
  uri: URL,
  headers: {
    Authorization: `Bearer ${TOKEN}`,
  },
});

const link = ApolloLink.from([http]);

const cache = new InMemoryCache();

const apolloClient = new ApolloClient({
  link,
  cache,
});

export default apolloClient;
Now we are ready to create our first query to Contentful GraphQL API!
For this blog project, I have only needed two queries. One of them is for fetching all blog posts to display a list of them on the main page. The second one was made to get a single post by its slug. I placed them inside src/utils/contentful.js.
/// src/utils/contentful.js

import gql from "graphql-tag";
import apolloClient from "./apollo-client";

export async function getAllPosts() {
  const { data } = await apolloClient.query({
    query: gql`
      query GetAllPosts {
        postCollection {
          items {
            title
            subtitle
            sys {
              publishedAt
            }
            slug
            image {
              url
            }
          }
        }
      }
    `,
  });
  return data.postCollection.items;
}

export async function getPostBySlug(slug) {
  const { data } = await apolloClient.query({
    query: gql`
      query GetPostBySlug($slug: String!) {
        postCollection(where: { slug: $slug }) {
          items {
            title
            subtitle
            sys {
              publishedAt
            }
            image {
              url
            }
            content
          }
        }
      }
    `,
    variables: {
      slug,
    },
  });
  return data.postCollection.items[0];
}

export default { getAllPosts, getPostBySlug };
Now you can use those functions either on the client or server-side!
As you could see, combining all these technologies is not much of a problem. I think this mix gives us the possibility to build a great website that requires some CMS behind it. Using such systems as Contentful just making our developers live easier.
You can find the project repository on GitHub under this link.


